

Looking for some ideas on how to literacy and music? I’m hoping this blog post on how to make rain in music class gives you some interactive ideas.
I had an opportunity to pinch hit in a first grade classroom this week due to unexpected rainfall and flooding in Arizona and so some teachers were not able to get to school. As I helped them work on “sh”, “ch”, “th” digraphs from the spelling list on the board, I decided to integrate some musical elements into the lesson. After going through the sounds and the words I asked the students if they could make rain sounds using the digraphs.
Tongues whirled, lips babbled, teeth hissed (?), throats gutted out a storm of sounds that echoed the rain fall pounding outside the building. It only took a minute or two, the kids were engaged and their eyes really lit up as they came up with new “rain” sounds. I felt like it was a successful addition to the lesson and gave them an opportunity to imagine, create and share–things they need to do every day.
Rain songs are a great opportunity for Music teachers to really connect with literacy skills.
Here’s an activity I do with my K-2 students. When I greet my classes I’ll say something like; “I hope you brought your umbrella’s because it’s raining in the music room.”
I set out a variety of classroom instruments. Shakers, Rhythm sticks, Triangles, Cymbals, hand drums, sand blocks, tone blocks/wood blocks and some rain sticks. I also have some chimes and a gong that I’ll pull out too. As soon as students walk in and see all of the instruments they get so excited!
Next I start playing a shaker in one hand using a fast tempo ti-ti rhythm. I then get a second one and play them together.
Then I find a student that I think will be able to play alone and I hand them the shaker. I try not to say anything-I just use my own shaker to demonstrate and my facial expression (head nodding) to encourage the student to join me.
Once I have one student playing the shakers-I add another student or 2 to the mix. I spread them around the room.
Now I have everyone’s attention because the students have made the connection with the buckets of instruments and me handing them out, and they know that I might bring them one. All of a sudden students sit quietly, hands are in their lap and they are watching me intently. I can’t help but giggle inside at this.
I continue to choose an instrument, play it and then pass a few out. I’ve calculated the number of students and the number of instruments and give out just enough so that I’ll be able to use all of the instruments.
I play a different rhythm with each instrument and choose rhythms based on which grade I am teaching. For Kinders, I’ll keep it pretty simple and focus mainly on slow beats and fast beats.
First graders: I’ll use ta-ta-ti-ti-ta, the steady beat and more variations of ta and ti-ti.
Second graders: I’ll throw in some ta-ah, ta-ah rhythms and maybe a rest.
I try really hard not to talk at all-so I don’t explain or teach the rhythms. That’s not the goal of the activity.
We’re making rain in the music room.
The goal is for the students to experience the possibilities when making music and making connections to something they know about with music (making music relevant).
Making rain sounds is something everyone can relate to. Everyone’s heard the rain. That’s a good start!
I’m moving quickly now to get everyone an instrument. It’s getting louder and louder and I use my body and hands to bring the volume down or raise it.
I also have a sphere which I will use once I’ve handed out all of the instruments.
I walk around the room demonstrating the parts using my hands and hoping students will be able to hold their parts.

Then I take the sphere and stand so everyone can see me and I Begin moving the sphere in and out.
Students change the way they play their instrument when the sphere get’s big then tend to play louder and faster!
After we do this for a couple of minutes, I will put the sphere down and I’ll bring my hands way down to the floor -even sitting down and then I’ll give them the cut off sound.
SILENCE!
You can use this lesson a a great kick off for other spring themed music lessons.
Get this resource for FREE when you subscribe.
Then we’ll have a nice discussion about the sounds they made. I ask them to demonstrate using their words. I will try to get them to make the connection to rain.
“What did it sound like when I played just the shakers?”
“As I added in the Rhythm sticks, what sound could that be?”
And so the discussion continues until almost everyone has had a turn to share.
We put the instruments away and then I’ll teach them the song, “Rain, Rain, Go Away”
It’s a really fun lesson and one of my favorites. Using instruments and dynamics can help students connect to literacy.
Some extension ideas are to have students go to xylophones and play melody or some rain sounds as we sing the song.
If time permits, I’ll pull out all the instruments and we’ll have pitched (xylophones), non-pitched rhythm instruments and singers all making music together.
Remember what Carl Orff said: “Tell me, I forget…show me, I remember…Involve me, I understand.”
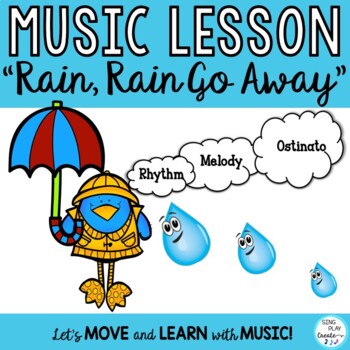
Looking for a lesson plan for Rain Rain Go Away?
“Rain, Rain, Go Away in my Store-if you’re interested you can find it HERE

I’m hoping that you’ll find some creative ideas to make rain in your music classroom.

If you like these ideas please share them with your teacher friends.
Click on the FERMATA symbol to go to some more great blog articles that will help you teach music.

Hi there! I’m Sandra, one of the authors behind Sing Play Create. My goal is to provide teachers with interactive resources and activities to improve the effectiveness of their teaching and enhance student learning.

© 2022 Sing Play Create. All Rights Reserved.
One Response